TinyRC.com - XMODS, XMOD, Micro Flight, ZipZaps, ZipZaps SE, Bit Char-G, MicroSizers, TTTT, Plantraco Desktop Rover, SuperSlicks, Digi Q, Forums, News, Pictures, Parts, and Shop
Forums, XMODS, XMOD, Micro Flight, ZipZaps, ZipZaps SE, Bit Char-G, MicroSizers, TTTT, Plantraco Desktop Rover, SuperSlicks, Digi Q
XMODS Hop-Ups, XMODS Parts, XMOD Hop-Ups, XMOD Parts, Bit Char-G Hop-Ups, Bit Char-G Parts, MicroSizers Hop-Ups, MicroSizers Parts

Go Back   TinyRC.com > 1/24 and Smaller > XMODS > XMODS Parts and Hop-Ups

Reply
 
Thread Tools Display Modes
  #1  
Old 12-31-2006, 04:58 PM
drewdown84's Avatar
drewdown84 drewdown84 is offline
Registered User
 
Join Date: Dec 2006
Location: fBk, CA
Posts: 138
Send a message via AIM to drewdown84 Send a message via Yahoo to drewdown84
5th & 6th Cell Modifications

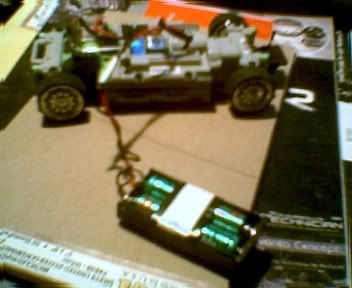
Lets see how this goes... I know someone was asking about how to do this and I said I'd post how I did mine... This was my first attempt at modding my car without it being premade for an xmod...

First thing you want to do is pick up a battery holder from RS... they only cost like 1.71 USD out the door... or at least thats what i did... you are gonna need some solder (rosin core) and a good soldering gun (with some knowledge of how to use it)...

once you have all this you are ready to start your upgrade... first of all... make sure your battery case fits in your xmod body... I had to shave off one side... and then got rid of the cover... and even shaved the bottom of it some more just so it would fit perfectly... then i used electrical tape as a hold down for the two batteries... if you do this, I would recommend covering the sticky part of the tape that is gonna go over the batteries... that way it doesnt stick to the batteries whenever you are trying to change them...

Now for the actuall install... first remove the cars crystal and the motor leads... Remove all the screws that hold down the cover on top of the chassis... Remove the chassis cover and then remove the screw (i believe its just one) that holds down the circuit board... CAREFULLY lift the board out of the chassis enough so you can put heat to the NEGATIVE battery lead and pull it off its connection... now take the POSSITIVE (red) lead from the new battery case and solder it to the connection that you just removed the negative lead from... solder the NEGATIVE (black) lead from the battery case to the NEGATIVE lead coming from the XMOD chassis... use heat shrink if you have it or electrical tape to cover the wire to wire connection... REASSEMBLE everything... one important thing... the wire leads to the battery case are gonna need to come out of the chassis cover... I cut a chunk out close to the hump in the middle at the front of the cover... seemed to work really well and was really easy... you'll see where they are on my pictures...


Shows the electrical tape i used to hold the batteries in... I also shaved about 1/2 an inch of plastic from the side the wires are coming out of... I removed the wires before cutting then resoldered them after i smoothed down everything...


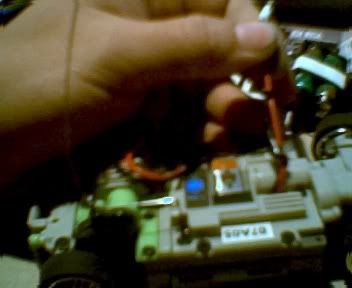
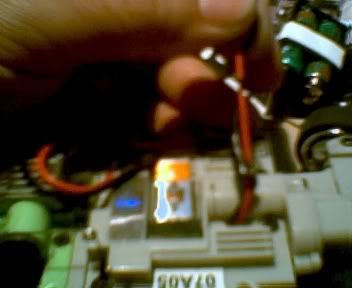
These two show where i cut the chunk out so the leads can come out from the cover... this was the best place i could think of, keeping in mind where the wires were already...


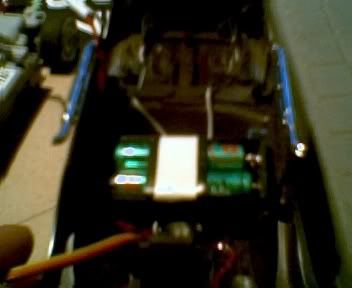
I still haven't figured out how im going to attach my battery case, but so far it is so snug fitting that it doesn't really cause weight shift that I can notice... and its easier to not attach it to the body when im working on the chassis... maybe in the future i'll make a connector that will allow me to install and uninstall the extra batteries quickly...


And lastly this is my Firebird... stock color... body kit... six cell modded... RS bearings... AWD... and headlights... (the underglow was removed while i was taking pictures for this post) ...and ususally i have the large rear tires on the car but I took it outside to beat it up some and i wanted to use tires that i could easily replace if i wore them down...


Well I hope this helps anyone that had questions, such as I did when I first started planning this...
__________________
67' Pontiac Firebird -> 6 Cell, Bodykit, AWD, RS Bearings, 4.5 Tie Rod With Blue Front Springs And Yellow Rear, Stage 2 Motor With 9/25 Gearing, Modded Light Kit, Drift Tires...

H2 -> 6 Cell, RS Bearings, AWD, Lift, Body

05' Ford Mustang -> Custom Tamiya Paint, Light Kit and thats it cuz it aint a GM... gonna get a 6 cell when my girl learns to solder...

Traxxas T-Maxx .15 -> Aluminum chassis parts... soon to get a custom light kit...

Associated RC10GT -> RPM bulkheads...
Reply With Quote
Reply

Bookmarks


Posting Rules
You may not post new threads
You may not post replies
You may not post attachments
You may not edit your posts

BB code is On
Smilies are On
[IMG] code is On
HTML code is Off
Forum Jump

Similar Threads
Thread Thread Starter Forum Replies Last Post
PLacement of 5th and 6th cell in Skyline? agent sharp XMODS Mods and Projects 1 05-01-2007 07:32 PM
5th cell problem, 5th cell heating? robehsi XMODS 3 07-17-2004 12:30 AM
6th cell power to weight worth it? RGM1524 XMODS Mods and Projects 24 03-31-2004 09:02 PM
I need help with a 5th or 6th cell installation... Chaos Fire XMODS Mods and Projects 3 12-24-2003 12:00 PM


All times are GMT -5. The time now is 09:54 AM.


Powered by vBulletin® Version 3.7.3
Copyright ©2000 - 2026, Jelsoft Enterprises Ltd.
Mini Inferno Sale - Up to $85 Instant Savings!
Micro-T Hop-Ups
RC18R, M18, Micro RS4, Mini-LST, TamTech-Gear, Minizilla, RC18T, RC18B, RC18MT
shop.tinyrc.com Products
Tiny RC Community News
[03/17/10] Kyosho Mini-Z F1 MF-010 SP2... : The Kyosho Mini-Z F1 MF-010 SP2 Carbon Limited ASF 2.4GHz Tx-Less Chassis Set - more»
[10/23/09] Kyosho Mini-Z MR-03 In Stock! : The Mini-Z MR-03 (http://mr-03.com) is now In Stock and Pre-Orders are shipping! - more»
[09/06/09] Labor Day Savings - $5 Off... : Labor Day traditionally marks the unofficial end of summer - but we're not ready to let go! So, we - more»
Mini-Z, Mini-Z Racer, MR-02, MA-010
M18, M18T, RC18T, Mini-LST, Mini-T, Micro RS4, XRay, 1/18, 18th scale
XMODS, XMOD, Micro Flight, ZipZaps, ZipZaps SE, Bit Char-G, MicroSizers, TTTT, Plantraco Desktop Rover, SuperSlicks, Digi Q
Mini Inferno, Mini Inferno ST, half EIGHT, 1/16, 16th scale
Epoch, Indoor Racer, 1/43, 43rd scale
E-Savage, eSavage, eZilla, e-Zilla, HPI
Robots, Bots, Bipeds, Wheeled, Manoi, Roomba, NXT, Lego, Hacking
Crawling, Crawlers, Micro, RC, Losi Mini-Rock Crawler, Duratrax Cliff Climber
Kyosho Minium, Caliber 120, Minium Forums
Mini-Z Hop-Ups, Mini-Z Parts, Mini Inferno Hop-Ups, Mini Inferno Parts, M18 Hop-Ups, M18 Parts