TinyRC.com - XMODS, XMOD, Micro Flight, ZipZaps, ZipZaps SE, Bit Char-G, MicroSizers, TTTT, Plantraco Desktop Rover, SuperSlicks, Digi Q, Forums, News, Pictures, Parts, and Shop
Forums, XMODS, XMOD, Micro Flight, ZipZaps, ZipZaps SE, Bit Char-G, MicroSizers, TTTT, Plantraco Desktop Rover, SuperSlicks, Digi Q
XMODS Hop-Ups, XMODS Parts, XMOD Hop-Ups, XMOD Parts, Bit Char-G Hop-Ups, Bit Char-G Parts, MicroSizers Hop-Ups, MicroSizers Parts

Go Back   TinyRC.com > 1/36 and Smaller > Losi Micro-T / Desert Truck / HIGH Roller > Micro-T Parts and Hop-Ups

Reply
 
Thread Tools Display Modes
  #1  
Old 02-12-2007, 12:00 PM
m_pastier m_pastier is offline
Registered User
 
Join Date: Feb 2007
Posts: 4
rear sway bar!


hello everyone!

i just bought my micro t 3 days ago and within the first 3 runs i broke the stearing links. went to my LHS they didnt have the parts so i was looking around and found small thin peices of plastic about 1 to .5 mm thicker all around. i went home and made a dozen sets of these. (it was white plastic material)

well then i didnt like how soft and unstable the rear was when turning hard on carpet.

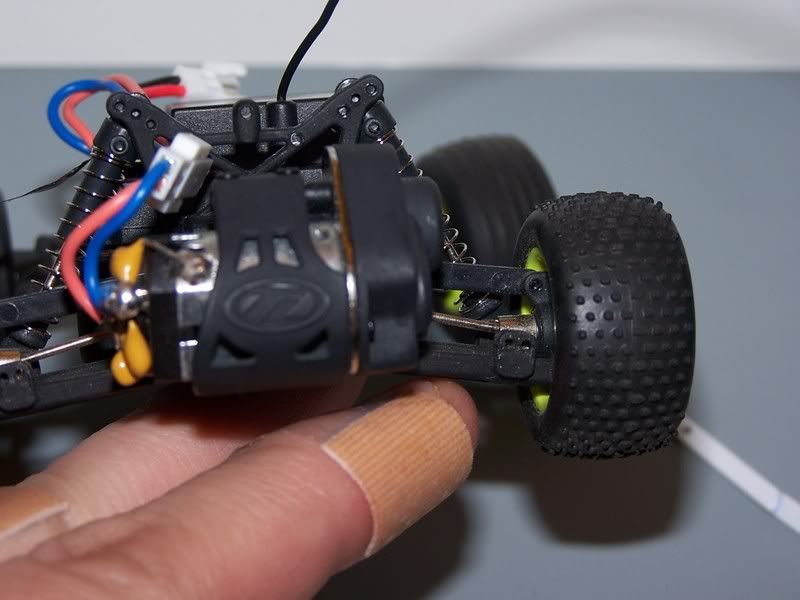
so i fabed up a rear sway bar!

the same material i used fot the straeing links i used for the RSB.

to build this:

you need that thin plastic peice i used for the stearing links.
sodering iron.
razor blade.
ruler in MM.
small drill bit.
pencil/pen
and TIME.

this took me about an hour to get it right, (3 tries)

getting started:
mark a point on the plastic strip this will be your "center", measure from that point 8-9 mm left and right from the center.
you should have a section marked about 16-18 mm wide.
next measure 25mm off each mark you just made(left and right),
so you should have a peice of plastic strip about 66 to 68 mm long.
now the hard part: heat up the souldering iron

I xI center Ix I

^ this is the strip the center should be left flat

using the iron hold the strip over the tip where X in marked just DO NOT TUCH IT!

as you are holding it there twist the strip.
(the goal is to have a strip of plastic with 2 90 degree twists in it)

repeate for the other side
center
looking down(top): _hole_______x::::::x_______hole_

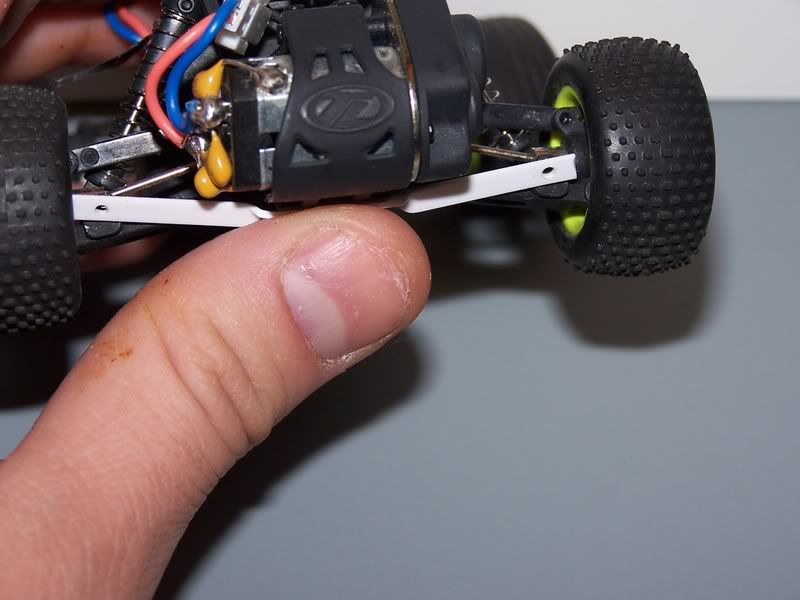
now hold the flat part to the bottom of the car and mark your holes
NOTE mark both, drill one screw it down then check to see if the mark still lines up, drill second the hole.

attach to the rear of the car and enjoy!

i just joined thie site so when i figure out how to post pictures i will do so

GOOD LUCK!

Last edited by m_pastier; 02-12-2007 at 06:34 PM.
Reply With Quote
  #2  
Old 02-12-2007, 01:23 PM
xboxd83 xboxd83 is offline
Registered User
 
Join Date: Feb 2007
Location: La Puente CA SGV
Posts: 31
Send a message via AIM to xboxd83
Lightbulb

a picture would really help
Reply With Quote
  #3  
Old 02-12-2007, 06:40 PM
m_pastier m_pastier is offline
Registered User
 
Join Date: Feb 2007
Posts: 4
Thumbs up

PICTURES ARE UP

hope this helps any questions ask
Reply With Quote
  #4  
Old 02-12-2007, 06:42 PM
xboxd83 xboxd83 is offline
Registered User
 
Join Date: Feb 2007
Location: La Puente CA SGV
Posts: 31
Send a message via AIM to xboxd83
i still dont understand how the rear sway helps
Reply With Quote
  #5  
Old 02-12-2007, 06:47 PM
m_pastier m_pastier is offline
Registered User
 
Join Date: Feb 2007
Posts: 4
ok do you know what a Rear sway if for?

the simpliest way to explain this to you is it keeps the car flat in a corner. reduces "under steer" on carpet and i can drift prety good on hardwood ect.

it makes the truck turn faster/sharper.

PS. the suspension is still fully functional
Reply With Quote
  #6  
Old 02-12-2007, 07:03 PM
xboxd83 xboxd83 is offline
Registered User
 
Join Date: Feb 2007
Location: La Puente CA SGV
Posts: 31
Send a message via AIM to xboxd83
Smile

you think you can make more and sell me a pair on ebay
Reply With Quote
Reply

Bookmarks


Posting Rules
You may not post new threads
You may not post replies
You may not post attachments
You may not edit your posts

BB code is On
Smilies are On
[IMG] code is On
HTML code is Off
Forum Jump

Similar Threads
Thread Thread Starter Forum Replies Last Post
Mounting Mini-Z bodies on Xmods neurokinetik XMODS Mods and Projects 18 12-28-2005 05:13 PM
Tuning Basics sperry XMODS Parts and Hop-Ups 12 11-19-2003 12:56 AM
Rear suspension on a bit? chelboed Bit Char-G Mods and Projects 28 04-13-2003 09:51 AM
Solved KIT rear issue...... DarkTari Bit Char-G / MicroSizers 0 02-10-2003 10:48 AM
whoa, Taiyo rear is removable, meaning: CUSTOM T BAR REAR SUPSENSION MOD TIME!!! MTL Auldey (All) 6 12-30-2002 07:53 PM


All times are GMT -5. The time now is 09:44 PM.


Powered by vBulletin® Version 3.7.3
Copyright ©2000 - 2026, Jelsoft Enterprises Ltd.
Mini Inferno Sale - Up to $85 Instant Savings!
Micro-T Hop-Ups
RC18R, M18, Micro RS4, Mini-LST, TamTech-Gear, Minizilla, RC18T, RC18B, RC18MT
shop.tinyrc.com Products
Tiny RC Community News
[03/17/10] Kyosho Mini-Z F1 MF-010 SP2... : The Kyosho Mini-Z F1 MF-010 SP2 Carbon Limited ASF 2.4GHz Tx-Less Chassis Set - more»
[10/23/09] Kyosho Mini-Z MR-03 In Stock! : The Mini-Z MR-03 (http://mr-03.com) is now In Stock and Pre-Orders are shipping! - more»
[09/06/09] Labor Day Savings - $5 Off... : Labor Day traditionally marks the unofficial end of summer - but we're not ready to let go! So, we - more»
Mini-Z, Mini-Z Racer, MR-02, MA-010
M18, M18T, RC18T, Mini-LST, Mini-T, Micro RS4, XRay, 1/18, 18th scale
XMODS, XMOD, Micro Flight, ZipZaps, ZipZaps SE, Bit Char-G, MicroSizers, TTTT, Plantraco Desktop Rover, SuperSlicks, Digi Q
Mini Inferno, Mini Inferno ST, half EIGHT, 1/16, 16th scale
Epoch, Indoor Racer, 1/43, 43rd scale
E-Savage, eSavage, eZilla, e-Zilla, HPI
Robots, Bots, Bipeds, Wheeled, Manoi, Roomba, NXT, Lego, Hacking
Crawling, Crawlers, Micro, RC, Losi Mini-Rock Crawler, Duratrax Cliff Climber
Kyosho Minium, Caliber 120, Minium Forums
Mini-Z Hop-Ups, Mini-Z Parts, Mini Inferno Hop-Ups, Mini Inferno Parts, M18 Hop-Ups, M18 Parts