
09-17-2006, 08:38 PM
|
 |
TinyRC Pro
|
|
Join Date: Jan 2006
Location: atlanta, ga
Posts: 47
|
|
Quote:
Originally posted by alpha_003
the only thing I'm worried about is the servo space since everyting is so limited in space; and weight distribuiton, since im putting both batteries on one side, but the motor will probably balance it out.....i hope.
also, i am making a new chassis, but I'm not sure, wheter to use lexan and cut it up or shape it out brass...what do you guys suggest???
|
Are you planning on a SE motor? If so, I don't think that will offset the battery weight enough. My suggestion for the chassis is look at what is sitting in front of you, arranged in some order, and think about what to do. On my 4xSE project, I am thinking complete custom plastic chassis, and brass for suspension and driveline components. That'll keep the weight lower than all brass.
|
09-17-2006, 08:54 PM
|
|
Registered User
|
|
Join Date: Jan 2006
Location: southeast michigan
Posts: 95
|
|
|
On my custom all plastic chassis for my ZZse-AWD I plan on using a small LI-po batt that will fit pretty much fit across the bottom of the chassis.
The motor will be in the left vertical support and I have NO idea of where that steering servo will end up(anywhere I want it for the most part).LOL
PCB will be on top of it all.
I'm dremeling it out by hand right now, I'm to lazy to code it up and baby sit the machine right now.The CNC would be much better than what I can do by hand though.LOL
|
09-18-2006, 09:22 AM
|
|
TinyRC Pro
|
|
Join Date: Jan 2006
Location: atlanta, ga
Posts: 47
|
|
So the are bodys still going to fit on it? The most challing thing is working it all into the small parameters 
|
09-18-2006, 02:15 PM
|
|
Registered User
|
|
Join Date: Jan 2006
Location: miami, florida
Posts: 119
|
|
|
i am actually using a much stronger motor, the servo motor off an xmod evo. its has really low rpm and tons of torque for its size. since its bigger, i want to using a dual battery setup to supply enough energy to it.
i am going to use a plastic chassis and brassfor the tranny and suspension posts. i can put the batteries in the bottom because the inner tranny goes there and(3 and 4th gear and driveshafts).
i cant place the batteries on top of the axles since i barely have enough space, so i will try to make the spur and crown gear of the drive axle in the middle,(which wont look real, so beats the purpose) so that way i can have one batterie on each side laid down horizontally for best weight distribuiton.
will update soon, gonna go cut up my chassis and tube the axles....yeah right!
like i have enough time during the week to do that.
-Lino
|
11-03-2008, 09:29 AM
|
|
TinyRC Pro
|
|
Join Date: Jan 2006
Location: atlanta, ga
Posts: 47
|
|
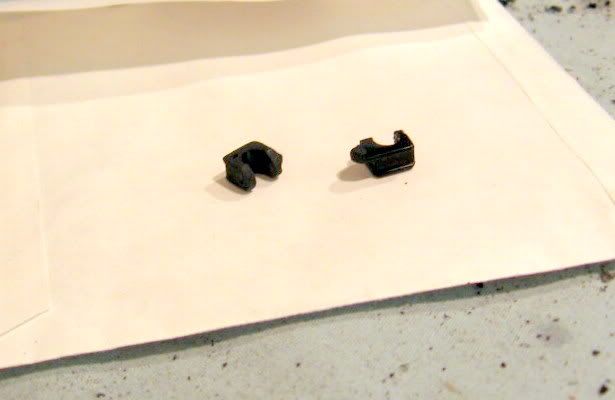
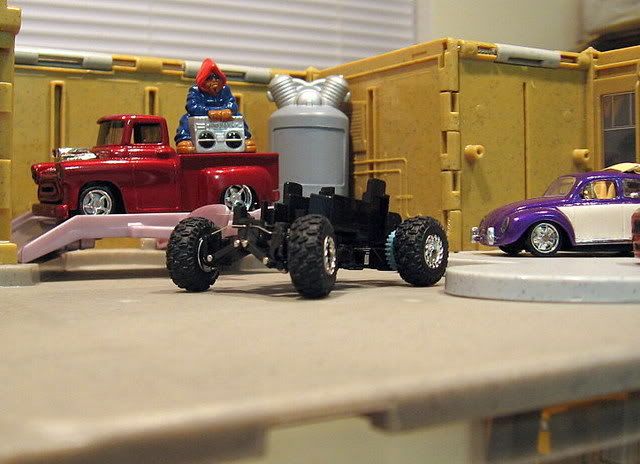
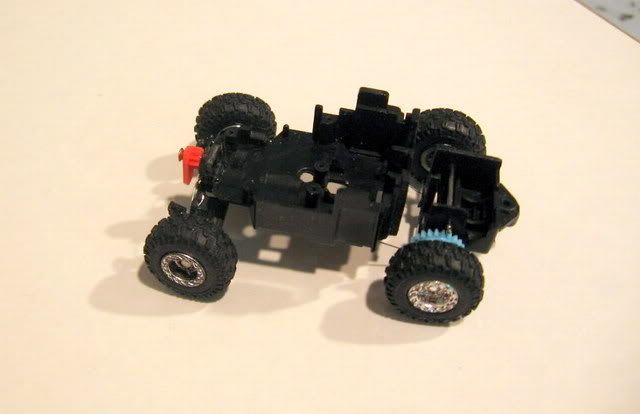
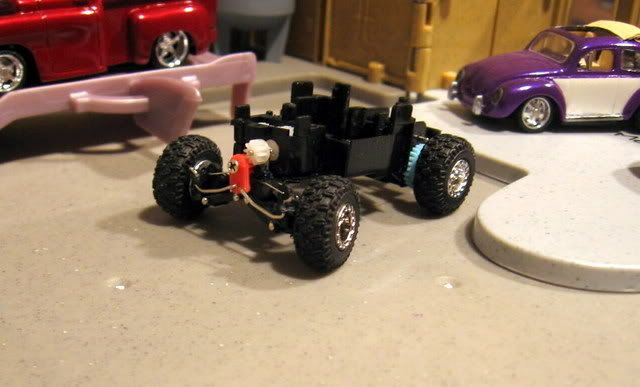
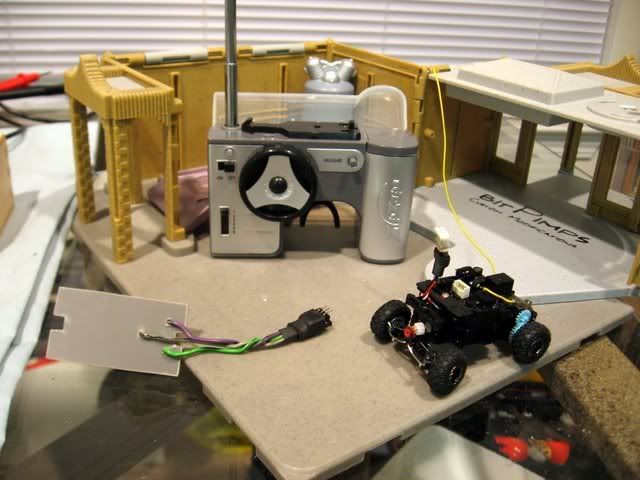
It's been a while since I've been on this site - sorry.Here is the updated build.
Scratched the other chassis design.
I started from scratch with one of the Zips I am doing the rear music string suspension mod to. And since I have been cutting a lot of plastic, I decided to try and finish this build.
The breakdown so far. I lucked out and found some plastic that had the right geometry for a c-hub (of course some dremmel and nailfiling had to be done), I used sewing needles for hinge pins, cut some strips of plastic for lower arms, and used a single piece of thin music wire for the upperlinks that double as the actual "shocks".
I didn't take many pics of the progress, I was being fairly productive with this part of the build.
Here ya go..... 8-)
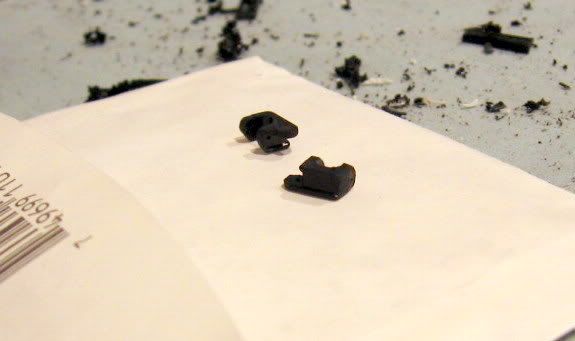
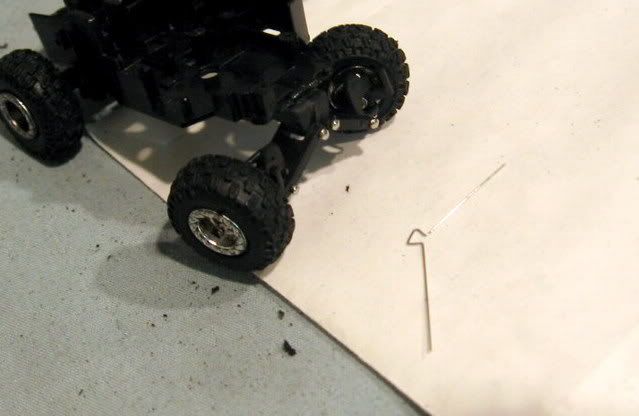
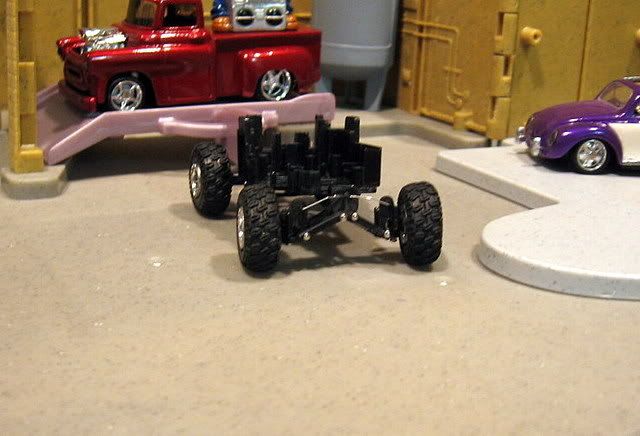
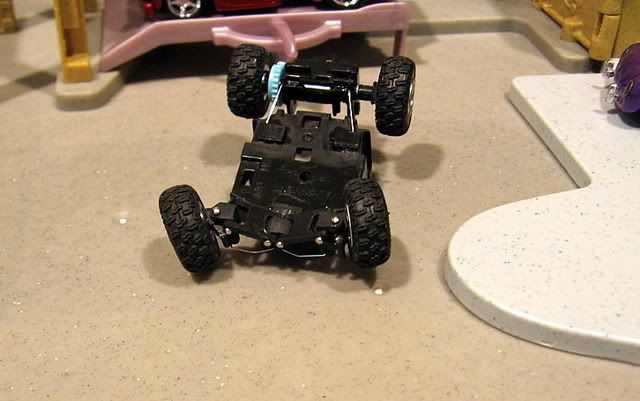
I used a pinion gear from a clone bit, and stuck it on the Se servo shaft. It was pretty large, and close to the same diameter. I added a little more plastic above the upper link in the center. I then cut up a red ZZMT gear for the "servo horn", and used a tiny shoulder screw to keep it in place. Sewing needles are used for the tierods.
I may end up making my own steering knuckles, because I had already broken both of them off while fitting and test fitting the rods. CA to the rescue, but dealing with that stuff on this small of a scale just plain sucks.


|
11-03-2008, 09:30 AM
|
|
TinyRC Pro
|
|
Join Date: Jan 2006
Location: atlanta, ga
Posts: 47
|
|
|
|
 Posting Rules
|
You may not post new threads
You may not post replies
You may not post attachments
You may not edit your posts
HTML code is Off
|
|
|
 Similar Threads
|
| Thread |
Thread Starter |
Forum |
Replies |
Last Post |
|
Headlight mod
|
InGaN |
Bit Char-G Mods and Projects |
10 |
12-30-2002 03:59 PM |
All times are GMT -5. The time now is 01:01 PM.
|
|


 [/quote]
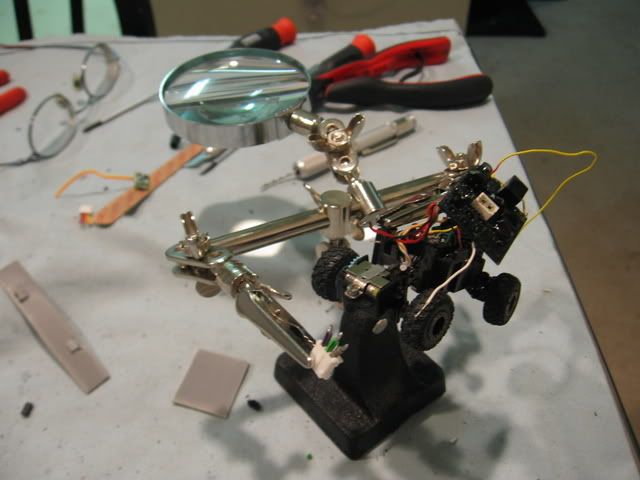


 Linear Mode
